
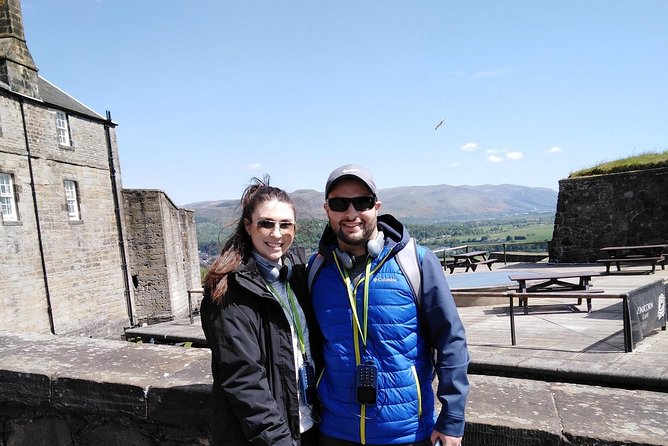
REVIEW · LOCH LOMOND & THE TROSSACHS
Stirling Castle, Hairy Coo’s & The Trossachs
Skip the rental car and watch Scotland unfold. This private tour lines up Stirling Castle, the Kelpies, Bannockburn, and the Trossachs, with Hairy Coos feeding and a Loch Lomond drive, all in one day.
I love the chauffeured private transportation, especially with snacks, Irn Bru, and hot coffee or tea so you are not wasting time looking for food. I also love the Hairy Coos visit at Kilmahog Woollen Mill, and our guide David Cornwallis makes the history fun and easy to follow.
One drawback to plan for is entrance fees: lunch is not included, and Stirling Castle admission is extra.
In This Review
- Key highlights worth marking on your day
- A car-free day that strings together Stirling and the Trossachs
- How the day is paced in an air-conditioned minibus
- Kelpies and The Helix: walking up to 98-foot giants
- Bannockburn visitor center: Robert the Bruce on the battlefield grounds
- Stirling Castle: the 8 handovers that shaped Scotland
- Kilmahog Woollen Mill and the Hairy Coos you can feed
- Lunch at The Lade Inn, then Loch Lomond from the road
- Price and what you are really paying for
- Who should book this Stirling and Trossachs private day trip
- Should you book Stirling Castle, Hairy Coos, and the Trossachs?
- FAQ
- How long is the Stirling Castle, Hairy Coo’s & The Trossachs tour?
- Is this tour private or shared with other groups?
- What is the group size limit?
- Is pickup included?
- What is included with the tour for food and drinks?
- Is lunch included in the price?
- Are entrance fees included for attractions?
- Does the tour include a guided tour inside Stirling Castle?
- Can you feed the Highland cows at Kilmahog Woollen Mill?
- Do you stop at Loch Lomond?
Key highlights worth marking on your day
Private van for up to 7 people, with pickup offered and an air-conditioned ride
Kelpies and Bannockburn are free stops, so you spend less on ticket costs
Stirling Castle gets about 90 minutes to explore, with a free guided tour depending on conditions
Hairy Coo feeding at Kilmahog Woollen Mill, including a chance to give them a wee kiss if you dare
Snacks, bottled water, Irn Bru, plus coffee and tea keep the day moving
Scenic Loch Lomond and Trossachs drive after lunch, with no set stop at Loch Lomond
A car-free day that strings together Stirling and the Trossachs
This is the kind of Scotland day trip that makes sense when you want big-name stops, but you do not want the stress of driving between them. You get a private driver, a planned route, and a schedule that hits the big targets without feeling like you are running laps.
The day starts with modern Scotland at The Kelpies, then moves into medieval warfare and Scottish independence at Bannockburn, and finally shifts to one of the country’s most important castles at Stirling Castle. After that, you get a down-to-earth, feel-good break with Highland cows at Kilmahog Woollen Mill, then you finish with a countryside pub lunch and a scenic drive.
One detail I really like for value is the way the route mixes ticket-free experiences with one paid big-ticket moment. Kelpies and Bannockburn visitor center are free admissions, so your day does not hinge entirely on entry fees. Then you can decide how to spend at Stirling Castle and where to put your lunch budget.
If you want a Scotland intro that feels varied, this fits. If you already plan to spend hours and hours at a single site, this pace might feel a bit brisk, because it is built for ticking off a lot of highlights in about 8 hours.
How the day is paced in an air-conditioned minibus
The tour runs about 8 hours total and is designed for groups only from your party, not a big shared bus mix. The van is air-conditioned, which matters in Scotland when weather changes faster than your layers. You also get a printed, personalised route map with the day’s timetable, plus a mobile ticket, which is helpful if you like to stay oriented.
Timing-wise, the stops are short but purposeful:
- Kelpies and The Helix: about 30 minutes
- Battle of Bannockburn visitor center: about 30 minutes
- Stirling Castle: about 1 hour 30 minutes
- Kilmahog Woollen Mill: about 20 minutes
- The Lade Inn lunch stop: about 1 hour 30 minutes
That structure is smart because it balances “see it” time with “let’s talk about it” time. Also, the day includes drinks throughout: bottled water for each passenger, coffee and tea in the vehicle, plus Irn Bru. There are snacks too, including a stop where you get a sweet treat.
One practical tip: this route is easier when you travel light and keep essentials handy in your seat area. You will want quick access to a jacket, camera, and any day-of basics, because you are going from walk to walk without a long break.
And yes, the tour guide can add small custom touches when timing allows. One guide story I liked from real experience is how David Cornwallis was able to work in a Wallace Monument add-on. That kind of flexibility is worth asking about on the day, especially if you have a particular Scottish hero you want to focus on.
Still deciding on Lomond? These cover the same water
- Greenock Ocean Terminal: Loch Lomond & Highland 7 Hr Private Tour
★ 5.0 · 26 reviews - Greenock Private Tour Stirling Castle & Loch Lomond
★ 5.0 · 6 reviews
Kelpies and The Helix: walking up to 98-foot giants
The first stop is The Kelpies and The Helix, and it is built for wow-factor without needing a long attention span. You walk among the sculptures up close, which is the key here. Seeing photos of the 98-foot-high figures is one thing. Standing near them and walking around the base is a different experience.
There is also a good story behind them. The Kelpies are tied to Scottish folklore, told to keep young children away from dangerous water edges. At the same time, they are a tribute to Clydesdale horses that worked in three industries that were important in the area. That mix of myth and local industry keeps the sculptures from feeling like just art objects on a road trip.
You get about 30 minutes, and the admission ticket is free. There is a visitor centre where you can pick up souvenirs and handle comfort breaks. That matters because Kelpies is the first stop, so you want an easy start before the day’s history-heavy sites.
What I’d do during your time there:
- Take a few minutes to walk right up to the sculptures so you catch the scale
- Browse the visitor centre if you want a quick souvenir or a place to regroup
- Make sure you are comfortable for the next section, because after Kelpies you head into a battlefield storyline
Because the stop is brief, do not plan to linger too long. Use the time for the “up close” part and then move on with the day.
Bannockburn visitor center: Robert the Bruce on the battlefield grounds
Next you head to the Battle of Bannockburn Visitor Centre, run by the National Trust for Scotland. This stop is about 30 minutes and also free for admission. It is not a long lecture, but it does give you grounding.
The big idea is the victory at Bannockburn in 1314 and how Robert the Bruce became central to that turning point. You walk on the battlefield site, which helps the story click. It is much easier to understand why independence mattered when you are standing where conflict unfolded.
The visitor center adds context with a straightforward layout. You do not need to be a medieval expert. A good guide helps connect who the players were, what was at stake, and why Stirling Castle mattered later. You also get the “this is not just dates” effect, because the route keeps linking themes across stops.
The only consideration here is that it is a short stop, so if you want to read every single panel cover-to-cover, you may not have enough time. Plan for a quick scan, listen closely to what the guide highlights, and save deeper reading for later if you are a history sponge.
Stirling Castle: the 8 handovers that shaped Scotland
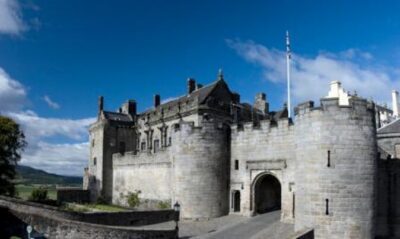
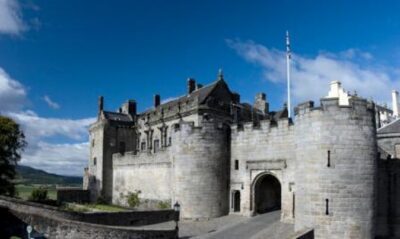
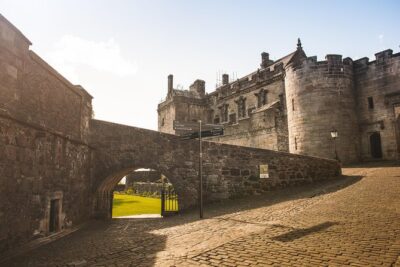
Now you hit the headline: Stirling Castle. Most historians consider it one of Scotland’s most important castles, and the reason comes through fast when someone points out just how often power shifted here. It changed hands 8 times between the Scots and the English over 400+ years tied to the fight for Scottish independence.
You get about 1 hour 30 minutes to explore. Admission fees for the castle are not included, so budget for that extra cost when you plan your day. The tour notes that there is a free guided tour included as part of admission cost, and when possible the guide will accompany you into the castle, depending on available parking.
That “depending on conditions” detail is worth knowing, because it affects how much the guide can move with you inside. Even if the guide cannot stay right beside you, you still get time to explore at your own pace once you are inside.
How to use your 90 minutes well:
- Prioritize the palace and the main rooms first, then add extra spots as time allows
- Keep your eyes up as well as straight ahead, because castles are designed for views and strategy
- If you can, use the free guided portion to get oriented fast, then wander with better context
One more note: because this is a major site, weather can matter. Stirling Castle means walking on uneven or outdoor areas at times. Wear shoes you trust and bring a jacket you can tolerate if the wind picks up.
Also, if you have a strong interest in William Wallace or Robert the Bruce, ask your guide what to focus on inside the castle. A good guide will help you connect the people to the specific rooms and viewpoints you are seeing.
Kilmahog Woollen Mill and the Hairy Coos you can feed
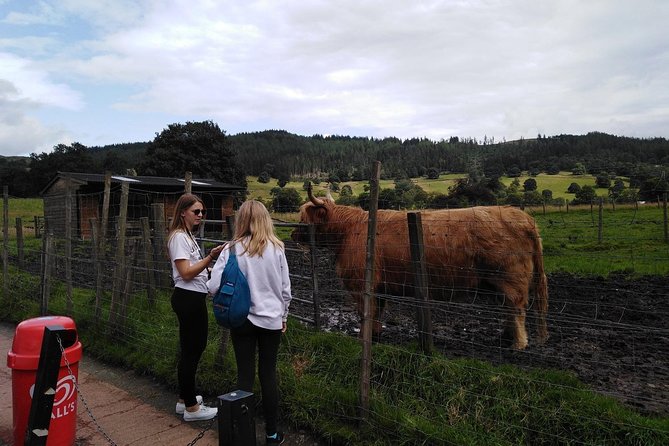
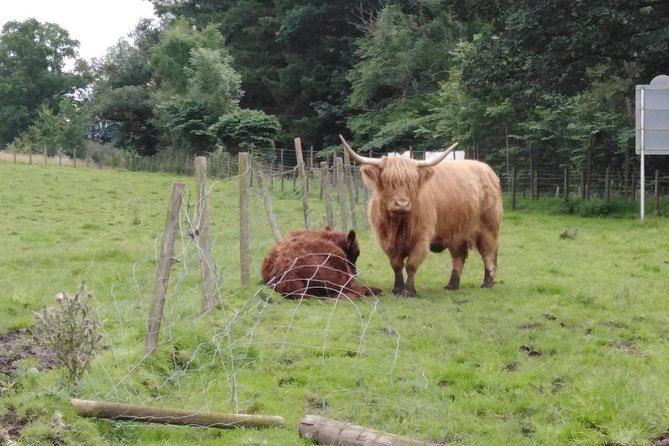
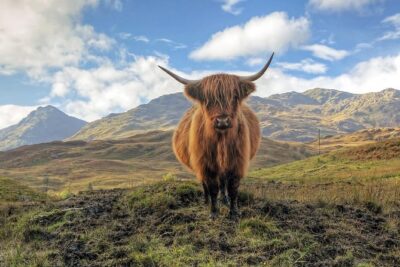
After castles and battles, you get a change of pace that is genuinely fun. At Kilmahog Woollen Mill, you meet three of Scotland’s famous Highland cows, nicknamed Hairy Coos by locals.
The stop is about 20 minutes and admission is free. You are invited to feed the cows, and those who are brave enough may even go for a wee kiss. The exact “how it works” details are not spelled out in the itinerary, so I’d treat this as a short, hands-on moment rather than a long interaction session.
What I like about this stop is that it resets your brain. You go from political warfare stories to a place where you can just watch animals and take photos without feeling like you missed something. It is also a nice reminder that Scotland is not only castles and maps, it is living places with people and work happening nearby.
There is also a visitor shop for Scottish souvenirs and rest rooms if you need a break.
Practical suggestion: keep your expectations realistic for a 20-minute stop. You will enjoy it most if you think of it as a highlight moment, not an extended farm visit.
Lunch at The Lade Inn, then Loch Lomond from the road
Lunch happens at The Lade Inn, a country pub in the Scottish countryside. This is where the day turns more relaxed. The stop is about 1 hour 30 minutes, and admission is listed as free because you are paying for food separately.
The itinerary notes traditional Scottish food and the possibility of locally crafted ales. Lunch is not included, so you will want to check your budget ahead of time. If you are traveling with picky eaters, you might appreciate the comfort of a pub setting, because it usually means familiar options alongside local dishes.
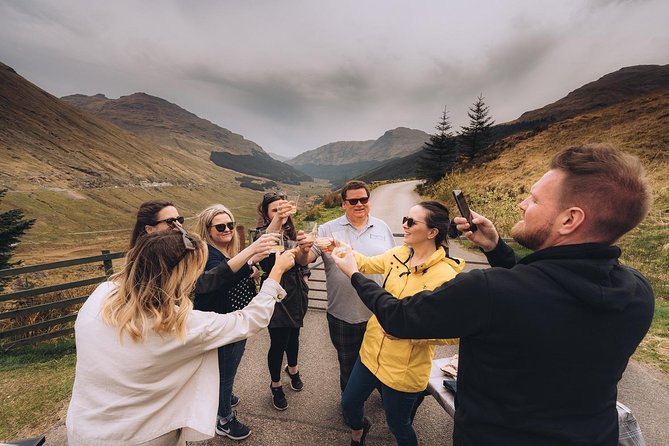
After lunch, you get the payoff drive. The tour includes a scenic drive through Loch Lomond and Trossachs National Park as you head back toward your pickup location. The important catch is that you are not planning to stop at Loch Lomond. So if your dream is shoreline time, boats, or a walk around the loch, you will need a different plan for that.
On the other hand, if you mostly want views and want to avoid parking and extra walking, this drive is the right kind of compromise. You get the “wow” factor without the time drain.
And because the van includes hot drinks and snacks, you will be less tempted to grab something expensive mid-route. That helps keep the day feeling like a package instead of separate errands.
Price and what you are really paying for
This tour costs $1,094.96 per group, up to 7 people. If you fill the group, that works out to roughly $156 per person at maximum capacity. The price is not just about access to sites. You are paying for the convenience of not arranging a rental car, not handling directions, and not managing the time math of dispersed stops.
You also get value in the included details:
- Private transportation in an air-conditioned vehicle
- Pickup offered and a timetable built into the day
- Snacks, bottled water, coffee and tea
- Irn Bru as the soda/pop choice
- A printed personalised route map
- A mobile ticket
On the cost side, plan for extra spending on what is not included: lunch and entrance fees into attractions, including Stirling Castle. The good news is that you have at least two major stops where admission is free (Kelpies and Bannockburn visitor center). So your spend is less scattered.
One more decision factor: the tour is private and booked on average 87 days in advance, which hints it can sell out. If you have fixed travel dates, reserve early so you are not forced into a less convenient day.
Who should book this Stirling and Trossachs private day trip
This tour is a great fit if you:
- Want a single-driver day that hits Stirling Castle and the Trossachs without logistics headaches
- Like a mix of history, folklore, and hands-on fun (Kelpies, Bannockburn, Hairy Coos)
- Travel with a small group that can share the per-group cost
It may not be your best choice if you:
- Care more about one site for a long time than multiple stops in one day
- Want an actual stop at Loch Lomond for walking or time on the water
- Prefer a self-guided plan where you control every minute
For families, the Kelpies folklore framing and the Hairy Coos feeding can be a real win, because it breaks the day into story and play instead of only monuments. For couples or small friend groups, the private van and included refreshments make it feel like a proper day out rather than a checklist.
Finally, a quick weather reality check: the experience requires good weather. If it has to be canceled due to poor weather, you will be offered a different date or a full refund. That is one reason I like to book with enough flexibility in your schedule.
Should you book Stirling Castle, Hairy Coos, and the Trossachs?
I would book this if you want Scotland highlights with a chauffeur and you are happy with a fast-moving but well-paced day. The best parts for me are the mix: big-hitters like Stirling Castle, story-driven stops like Bannockburn, and a genuinely joyful reset at Kilmahog Woollen Mill.
If your must-do list includes Loch Lomond walking time, you might skip this or pair it with a separate plan, since the route does not stop at Loch Lomond. And if you budget tightly, remember that lunch and castle admission are extra.
If you are traveling as a group of two to seven, the math improves, because the private van cost gets shared. For anyone who does not want to drive all day, this is one of the cleaner ways to see a lot of Scotland without turning your trip into a navigation project.
FAQ
How long is the Stirling Castle, Hairy Coo’s & The Trossachs tour?
The tour lasts about 8 hours.
Is this tour private or shared with other groups?
It is a private tour. Only your group will participate.
What is the group size limit?
The price is per group for up to 7 people.
Is pickup included?
Yes, pickup is offered.
What is included with the tour for food and drinks?
The tour includes snacks, bottled water, coffee and/or tea, and soda or pop (Irn Bru).
Is lunch included in the price?
No. Lunch is not included, though you do stop at The Lade Inn for lunch.
Are entrance fees included for attractions?
No. Entrance fees into attractions are not included. (Stirling Castle admission is not included.)
Does the tour include a guided tour inside Stirling Castle?
There is a free guided tour in the castle as part of the admission cost, and the guide will accompany guests into the castle when possible depending on available parking.
Can you feed the Highland cows at Kilmahog Woollen Mill?
Yes. You are invited to feed the cows, and there may be an opportunity for a wee kiss if you are brave enough.
Do you stop at Loch Lomond?
The tour includes a scenic drive through Loch Lomond and Trossachs National Park, but it is not planning to stop at Loch Lomond. The experience also requires good weather, and if it is canceled due to poor weather you will be offered a different date or a full refund.
Other Castles on the List
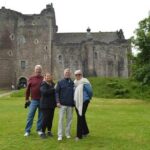
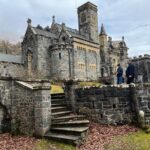
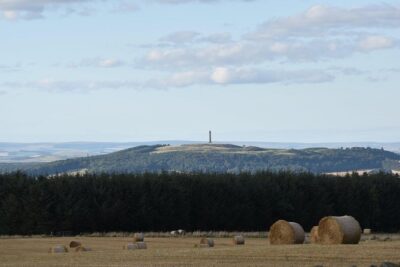
Stirling and the Monument
Lomond and the Trossachs, Compared
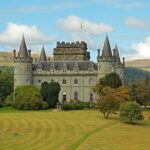
Newest write-ups around Scotland
- Stirling Castle, Hairy Coo’s & The Trossachs★ 5.0 · 3 reviews
- Isle of Skye transfer to Inverness★ 4.5 · 3 reviews
- The Heart Of Scotland Full-Day Private Tour★ 5.0 · 6 reviews
- Greenock Private Tour Stirling Castle & Loch Lomond★ 5.0 · 6 reviews
- Glasgow Greenock Shore Excursion Highland Lochs, Castles & Glens★ 5.0 · 6 reviews
Loch Lomond & the Trossachs, compared.
 ★ 4.5Loch Lomond, Kelpies & Stirling Castle Tour Including AdmissionFrom $721,305 reviews
 ★ 4.5Loch Lomond, Stirling Castle and the Kelpies Day TourFrom $631,198 reviews
 ★ 5.01 Day Castles, West Highlands and Loch Lomond Tour from EdinburghFrom $88850 reviews
 ★ 5.0Day Trip to Loch Lomond and Trossachs National Park with Optional Stirling Castle Tour from Edinburgh626 reviews
 ★ 5.0Stirling Castle, Loch Lomond and Cruise Day Tour from GlasgowFrom $98566 reviews
 ★ 4.5Loch Lomond, the Trossachs and Stirling CastleFrom $58343 reviews
 ★ 5.0Stirling Castle, Kelpies and Loch Lomond from EdinburghFrom $62273 reviews
 ★ 4.5Glasgow (Greenock) Shore Excursion: Stirling, Loch Lomond & The HighlandsFrom $93267 reviews
Browse the lists this tour appears in